
How to prepare FBA shipment – Guide
Amazon FBA is the largest and most advanced fulfillment service introduced to sellers. Amazon FBA has made shipment ever so easy. The Fulfillment Center by Amazon takes care of delivery efficiently.
As per a research published by statista.com in Dec 2020: “73% of the sellers on Amazon from the U.S. were using Amazon FBA by Dec 2018″.
All one has to do is opt for the FBA service and let Amazon take care of the entire delivery cycle which includes picking and packing products, shipping them, and handling customer service for the shipped products. It streamlines the process and helps you boost sales.
The seller account on Seller Central provides the user with tracking information of the products being shipped. Selling has never been so convenient. With the introduction of FBA, sellers do not have to take on the added burden of delivering the product to the end client.
Sellers now need to just spend time managing their inventory and making sales letting Amazon take care of the rest!
Using the best Amazon Repricer can give sellers a competitive edge. The combination of the fastest repricing tool along with Amazon FBA gives the seller what they covet the most – the Buy Box! You can find more about it here. The sellers do have to closely follow Amazon’s guidelines to prepare the merchandise to send as FBA shipment.
Step-by-Step Instructions on how to use FBA shipment:
This tutorial will help sellers who wish to use FBA and haven’t done so yet. This will provide comprehensive yet easy-to-understand step-by-step instructions on how you can opt for Amazon FBA through your Seller Central account.
- Login to your Seller Central account
- Click on “Manage Inventory”
- Select the desired product. On the far right corner, click on the “Edit” tab.
- Select “Change to Fulfilment by Amazon”.

- Once you click on that, a screen appears which asks you to enter the barcode type with which you will label your product for Amazon. You can either select the “Manufacture Barcode” or the “Amazon Barcode”.
- Select “Amazon Barcode”.
- Click on “Convert and Send Inventory”.
Note: Manufacture Barcode is the barcode that you get from your manufacturer. It contains your GTIC (UPN or EAN) whereas Amazon barcode is the barcode that you can generate using your seller account. Please note that not all products will have both options. Amazon makes that decision for you based on certain criteria.


- Another screen will appear which will ask you for additional product information. This information is based on the product you want to submit.
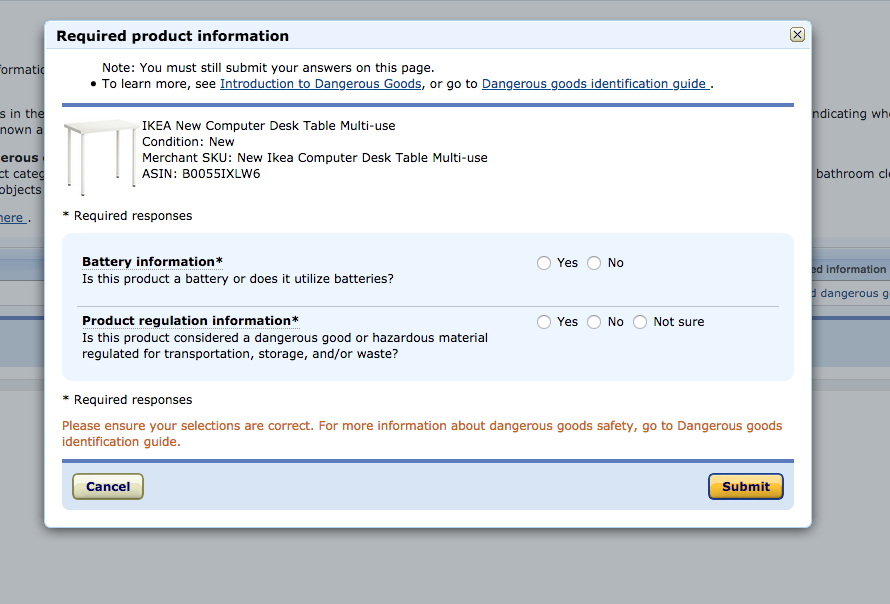
Note: Amazon wants to know if batteries are included in the product or if the product is hazardous in any way. You can find out more about “Dangerous goods” by clicking on the link “Dangerous goods identification guide”.
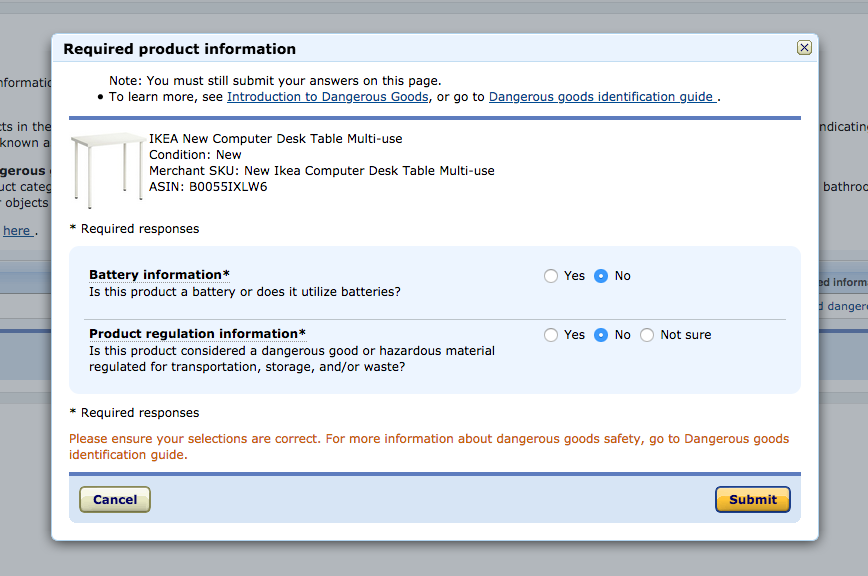
- Enter that information and click “Submit”.
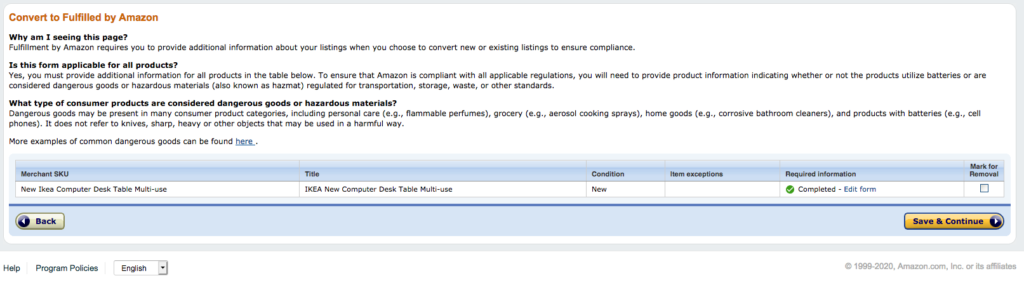
- Click on “Save and Continue”.
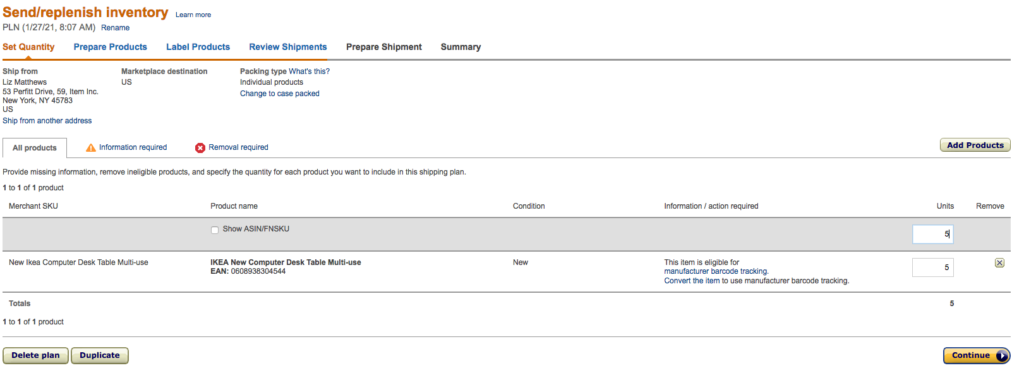
- The next screen allows you to “Ship/Replenish Inventory”. On the top left, you can add the address you want to ship from.
- Next, select the package type. Click on either “Individual Products” or “Case-Pack Products” whichever meets your requirement.
Note: You can find more about the difference between Individual products or Case packed products by clicking on the “What’s this link?”.
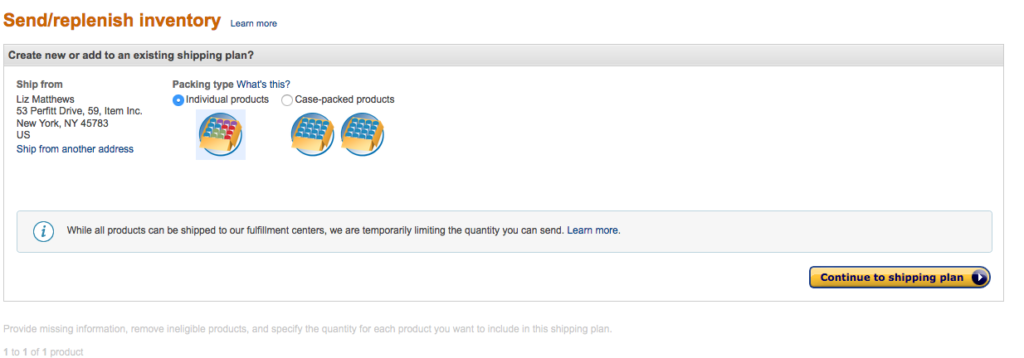
- Click on “Continue to shipping plan”. The next page lets you set your shipping plan.
- Define the units to plan on selling. Click “Continue”.
Note: Amazon products need to be put in a specific condition before they are shipped off. For e.g. if you are selling bags you may be required to wrap them in bubble wrap and put your label on them. However, there are many products, which do not require additional packaging.
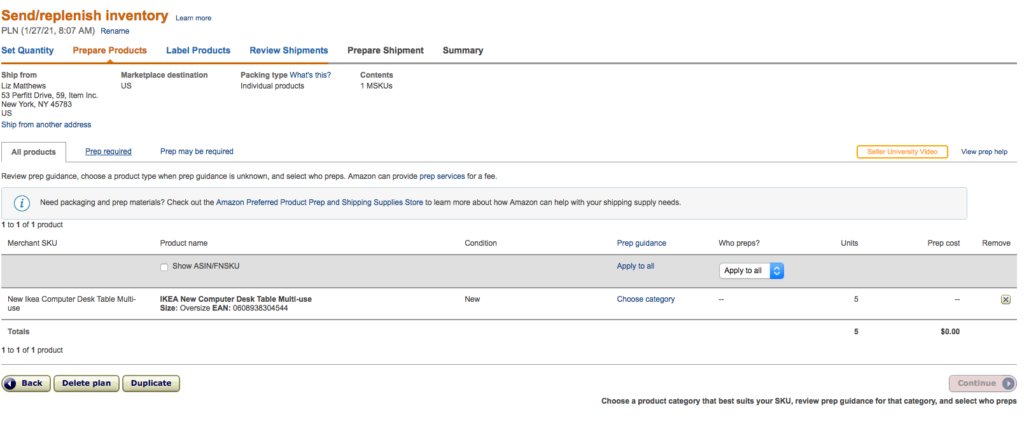
- The “Prepare Products” lets you specify the product you have and whether it needs prepping up. Click on “Choose Category”. This opens a window, which allows you to understand if, and how your product is to be prepped.
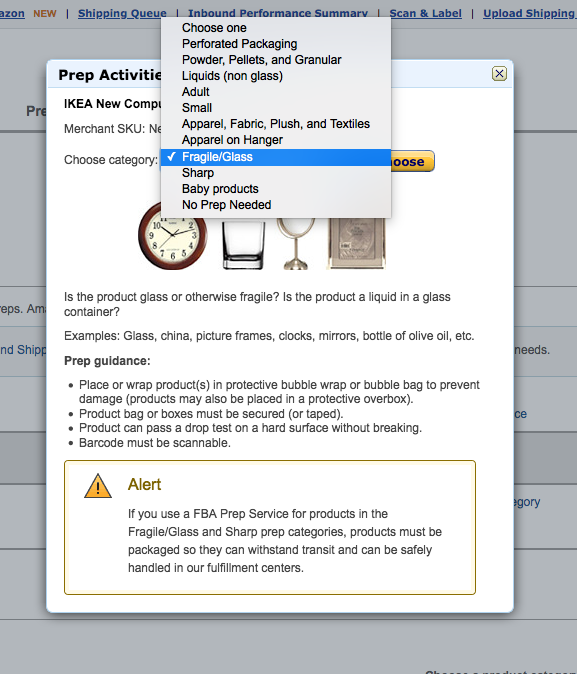
- Select the category your product belongs to. Select “No-prep needed” if your product does not belong to any of the categories listed.
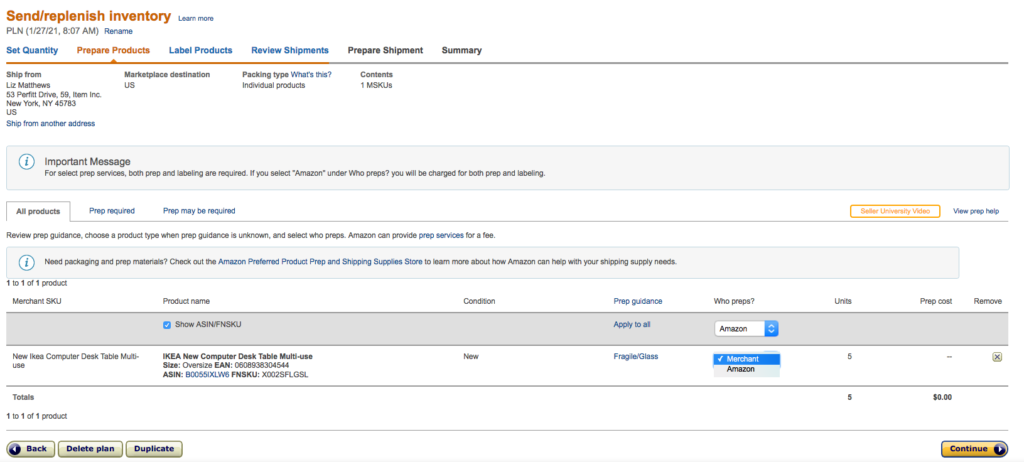
- Next, click on the “Who Preps?” option. Select “Merchant” if you wish to do it otherwise, select “Amazon”.
- Click “Continue”.
Note: You will have to pay Amazon a small fee per unit for the prep work.
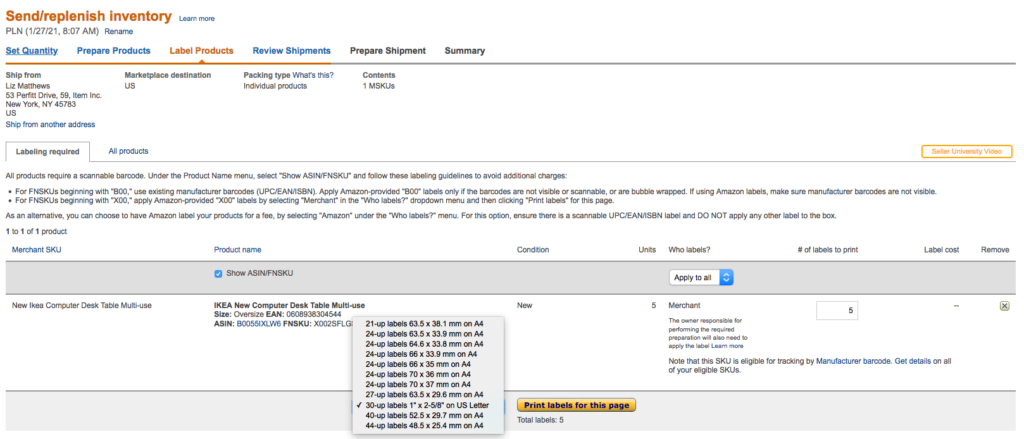
- The next tab “Label Products” lets you specify who you want to prep the product in terms of putting the barcode on it.
- Select “Merchant” if you wish to do it yourself. Select “Amazon” if you want Amazon to take care of it.
Note: Amazon charges a small fee for labeling your products for you.
- Select “Merchant” and click on “Continue”.
Note: Amazon lets you print the labels. Select the number of labels and the page size you want for the labels from the drop-down.
- Select the number of labels and page size using the drop-down. Click on “Print Labels for this page” to save the file in .pdf format. You can print the file when needed.
Note: You can purchase self-adhesive sticker sheets for printing the labels. Once printed, you can simply put the sticker on the product.
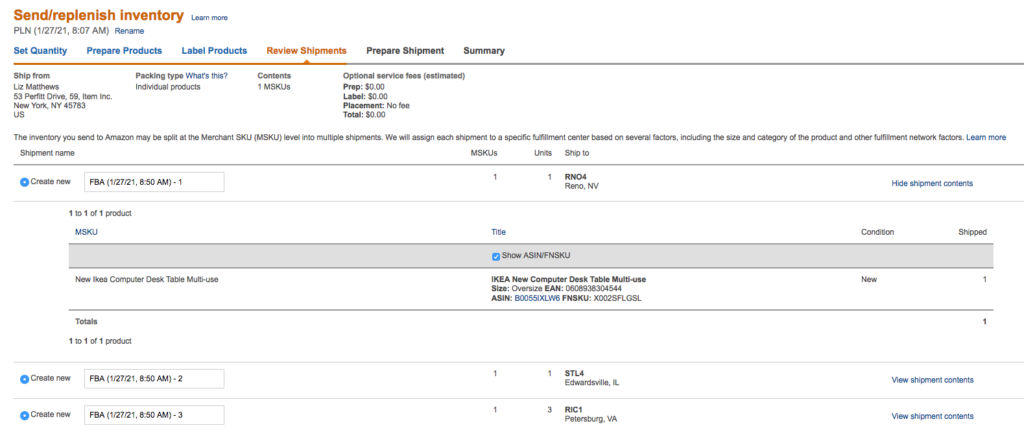
- The “Review Shipments” tab lets you see which Amazon Fulfilment Centers your products will be shipped to.
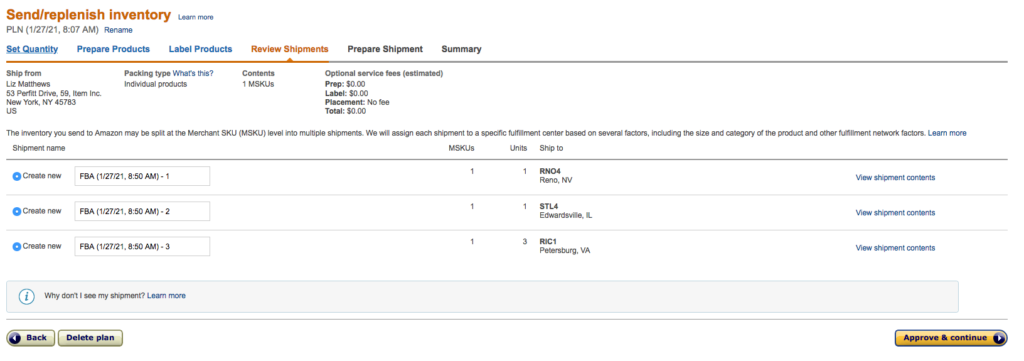
- Clicking on “View Shipment Contents” shows what will be shipped. Click on “Approve and Continue”.
- The “View Shipments” tab lets you select the shipment type for your products. This has to be done for every center to where your product is being shipped.
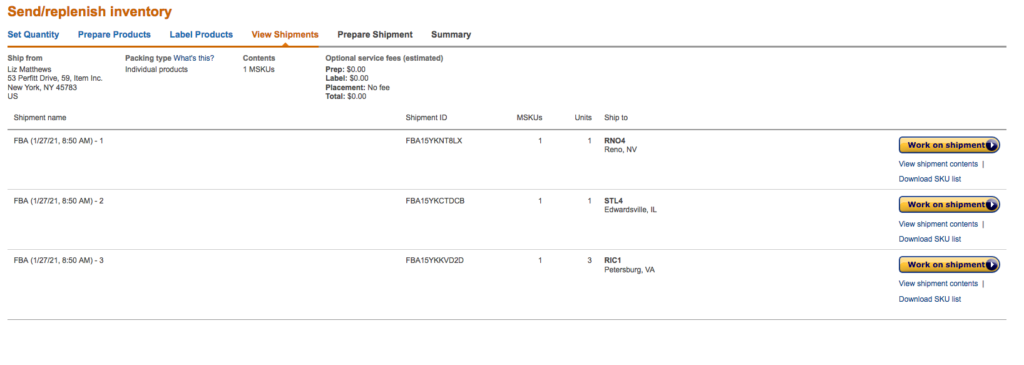
- Click on “Work on shipment”. This opens a detail page where you can define the “Shipping Method” and “Shipping Carrier”.
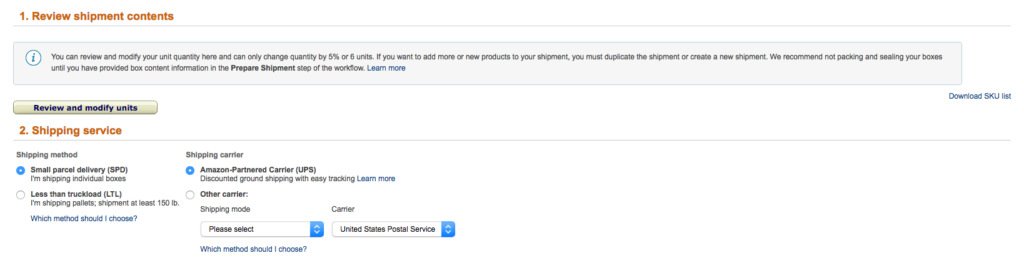
- Select the shipping method of your choice.
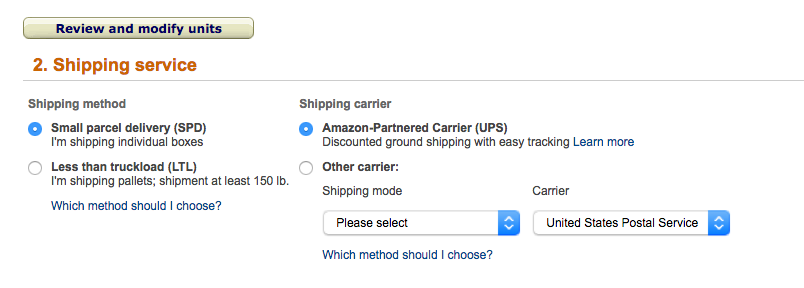
Note: For more details on which shipping method to opt, click on the “Which method should I choose?”
- Select the shipping carrier.
Note: Amazon offers its partner carrier (UPS). However, you can also select some other carrier that you may prefer from the drop-down. It also lets you select the “Shipping mode” along with your preferred “Carrier”.

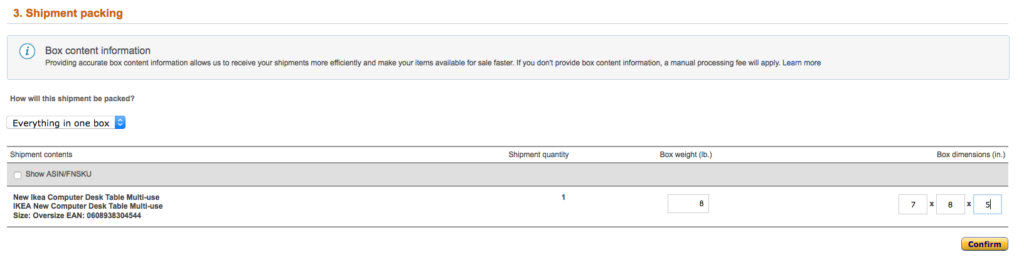
- Select the package type next. Select either “Everything in one box” if you pack all your units in one box.
Note: Specify whether all your units will fit in one box or you would need multiple boxes.
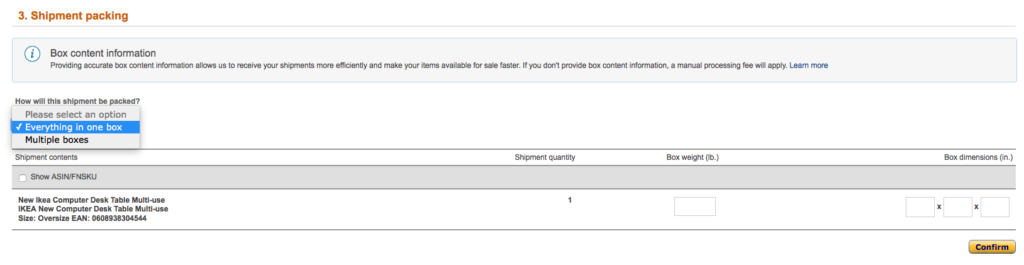
- Specify the weight of the box. Enter dimensions. Click “Confirm”.
Note: The weight would include combined weights of the product units, box, and tape.
- Next, Calculate “Shipping charges” by clicking on “Calculate”

- Click on “Accept charges”.
- Select “Shipping Labels” by selecting the paper type and specify the date when you will hand over the inventory to the carrier.
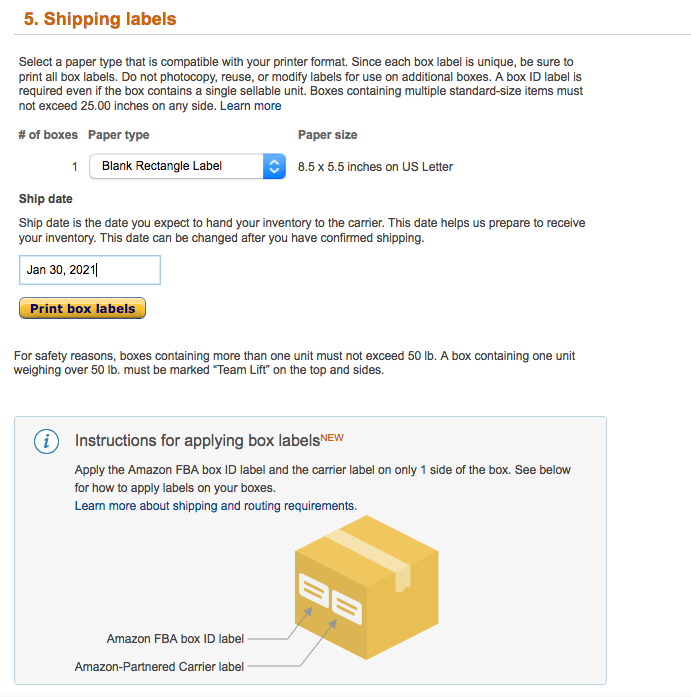
Note: Amazon scans these labels to see which product it is and then sorts it accordingly. The .pdf file contains two labels. One is the UPS label and the other is the Amazon FBA box label.
- Click on “Print box labels”. This will provide a .pdf version enabling you to print the labels. Once done, you will be able to see the shipment number on the summary page.
Note: The shipment number can be used to track the items you have sent. The same process is to be repeated for all other locations where your products will be sent.
Your FBA shipment is ready!
Amazon FBA and Buy Box
Many experts have analyzed that one of the key factors that Amazon takes into account while awarding the Buy Box is the usage of its FBA program. This along with the use of the usage of repricer tool has helped several sellers increase their sales exponentially and win the prized Buy Box.
If you have any queries about Amazon FBA or how it works, shout out to us at alpharepricer.com.
Author


