Amazon is the most popular and successful e-Commerce platform that hosts millions of sellers. With the increase in the number of brands, it has become challenging for Amazon sellers to satisfy and grab the attention of their customers. Fortunately, Amazon has launched a specified tool, “Amazon storefront,” to increase your customer base. Amazon storefront helps you differentiate your business and gain more customers.
It increases your brand’s visibility in search engine rankings while providing you an opportunity to tell your brand’s story through a combination of various images, videos, and A+ content. Moreover, this excellent tool helps you stand out among other competitors by driving traffic to your store through various ads.
Amazon storefront
Amazon storefronts are multipage digital storefronts that allow Amazon sellers to showcase all their products in one place and highlight top-notch content and graphics. Thus, it helps to grab the attention of potential customers by providing them with a unique shopping experience.
However, Amazon storefronts offer various benefits to all small and medium e-commerce businesses, and it is completely free of cost. But, Amazon sellers have to meet the following requirements in order to create an Amazon storefront.
1. Professional seller account
To create an Amazon storefront, it is necessary to have a professional seller’s account. You need to provide your account name, address, bank statement, email, password, and other essential details to get approved.
2. Signup into the Amazon brand registry
The brand owners and manufacturers must join the Amazon brand registry program by using their professional seller’s account. However, it will take a few days to get approval for this program. After the approval, you have to enroll your brand to create an Amazon storefront.
Here are the following things that you will need:
- Trademark registration number
- Brand serial number
- Complete list of your product categories.
- The image of your brand name on the product categories.
- Name of the countries where your product is distributed.
Amazon will send you a verification code in order to make sure that you are the trademark owner. After getting the code, you’ll give it to Amazon. In this way, you’ll get access to Amazon brand registry features.
3. Create your Amazon store
After enrolling your brand, the next step is to create an Amazon store. Here are the following steps to create an Amazon storefront:
- Go to seller central, click “Manage Stores,” and then select a homepage theme and template.
- The next step is to click “create store,” and you’re good to go!
However, if you want to create your own template, you can use various images and videos to highlight your Amazon store’s essential products.

4. Select a template for your store
There are three templates that you can use for your store—the product grid, marquee, and showcase. These templates help you build your product pages.

Product grid
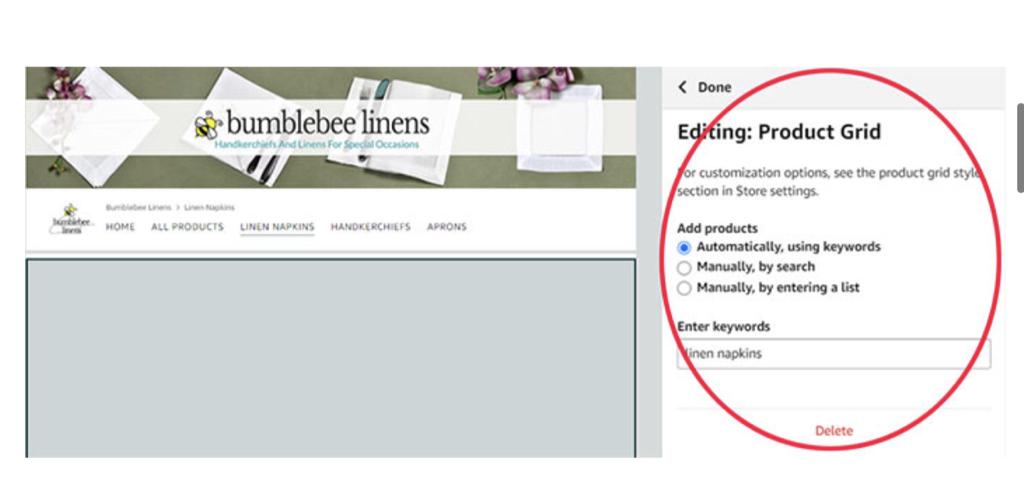
The product grid is a simple template. You can add a large volume of products in multiple rows of four. It becomes accessible for customers to browse your entire range of products with minimal scrolling easily. Thus, it makes the purchase of your customers much more simplified.
Marquee
This template is mostly used in category pages. This effective theme lets you feature products and add other details such as eye-catching images, product descriptions, or text.
Showcase
This template is used for showcasing products and branded assets. It works exceptionally well for homepages or category pages. Moreover, by using this template, you can feature the bestsellers of your brand to grab the attention of your potential customers.
5. Add your products
After selecting the template for your store, now it’s time to add products to your Amazon storefront. Product grid and product tiles are the two ways to add products to your Amazon store. However, you can also use ASIN numbers to add products to your store.

6. Submit for approval
After the above steps, submit your store to Amazon for review. Click “submit for publishing.” Amazon may take a few days to complete the process. Thus, the status bar will show you the progress.
Conclusion
Creating an Amazon storefront provides an opportunity to promote your branded products. It increases brand awareness by offering a convenient shopping experience to your customers in one place and helps to skyrocket your sales.
In addition to this, a better pricing strategy can add value to your business and help you gain more customers. Try Alpha Repricer. It is the continuous and fastest Amazon repricing software that helps you reprice your products in 2 minutes. Moreover, this excellent tool helps you stay competitive and win the Buy Box.

SIGNUP now for our free 14-day trials and experience the best Amazon repricing tool in the industry!
Author
-
Noor Jarri
Meet Noor Jarri, a seasoned writer specializing in the dynamic world of Amazon. With over three years of experience, Noor has become a trusted resource for Amazon sellers seeking guidance on repricing strategies and navigating the e-commerce landscape.
As a valued contributor to Alpha Repricer, Noor's expertise shines through in her engaging blog articles, press releases, and guest posts. Praised for her skill in crafting content that is both informative and approachable, Noor's writing is a knowledgeable resource for sellers of all levels.
Beyond her professional pursuits, Noor is an avid traveler and culinary enthusiast. She finds inspiration in exploring new destinations and experimenting with recipes from around the world.Join Noor Jarri on her journey as she continues to empower Amazon sellers with insights, tips, and strategies to thrive in the ever-evolving marketplace.


